Thank you! Your submission has been received!
Oops! Something went wrong while submitting the form.
This quick start user guide will show you all the basics of your 3CX telephone system, including:

When we first set up your system, you will receive an email from 3CX containing all the information you’ll need to setup your 3CX web client.
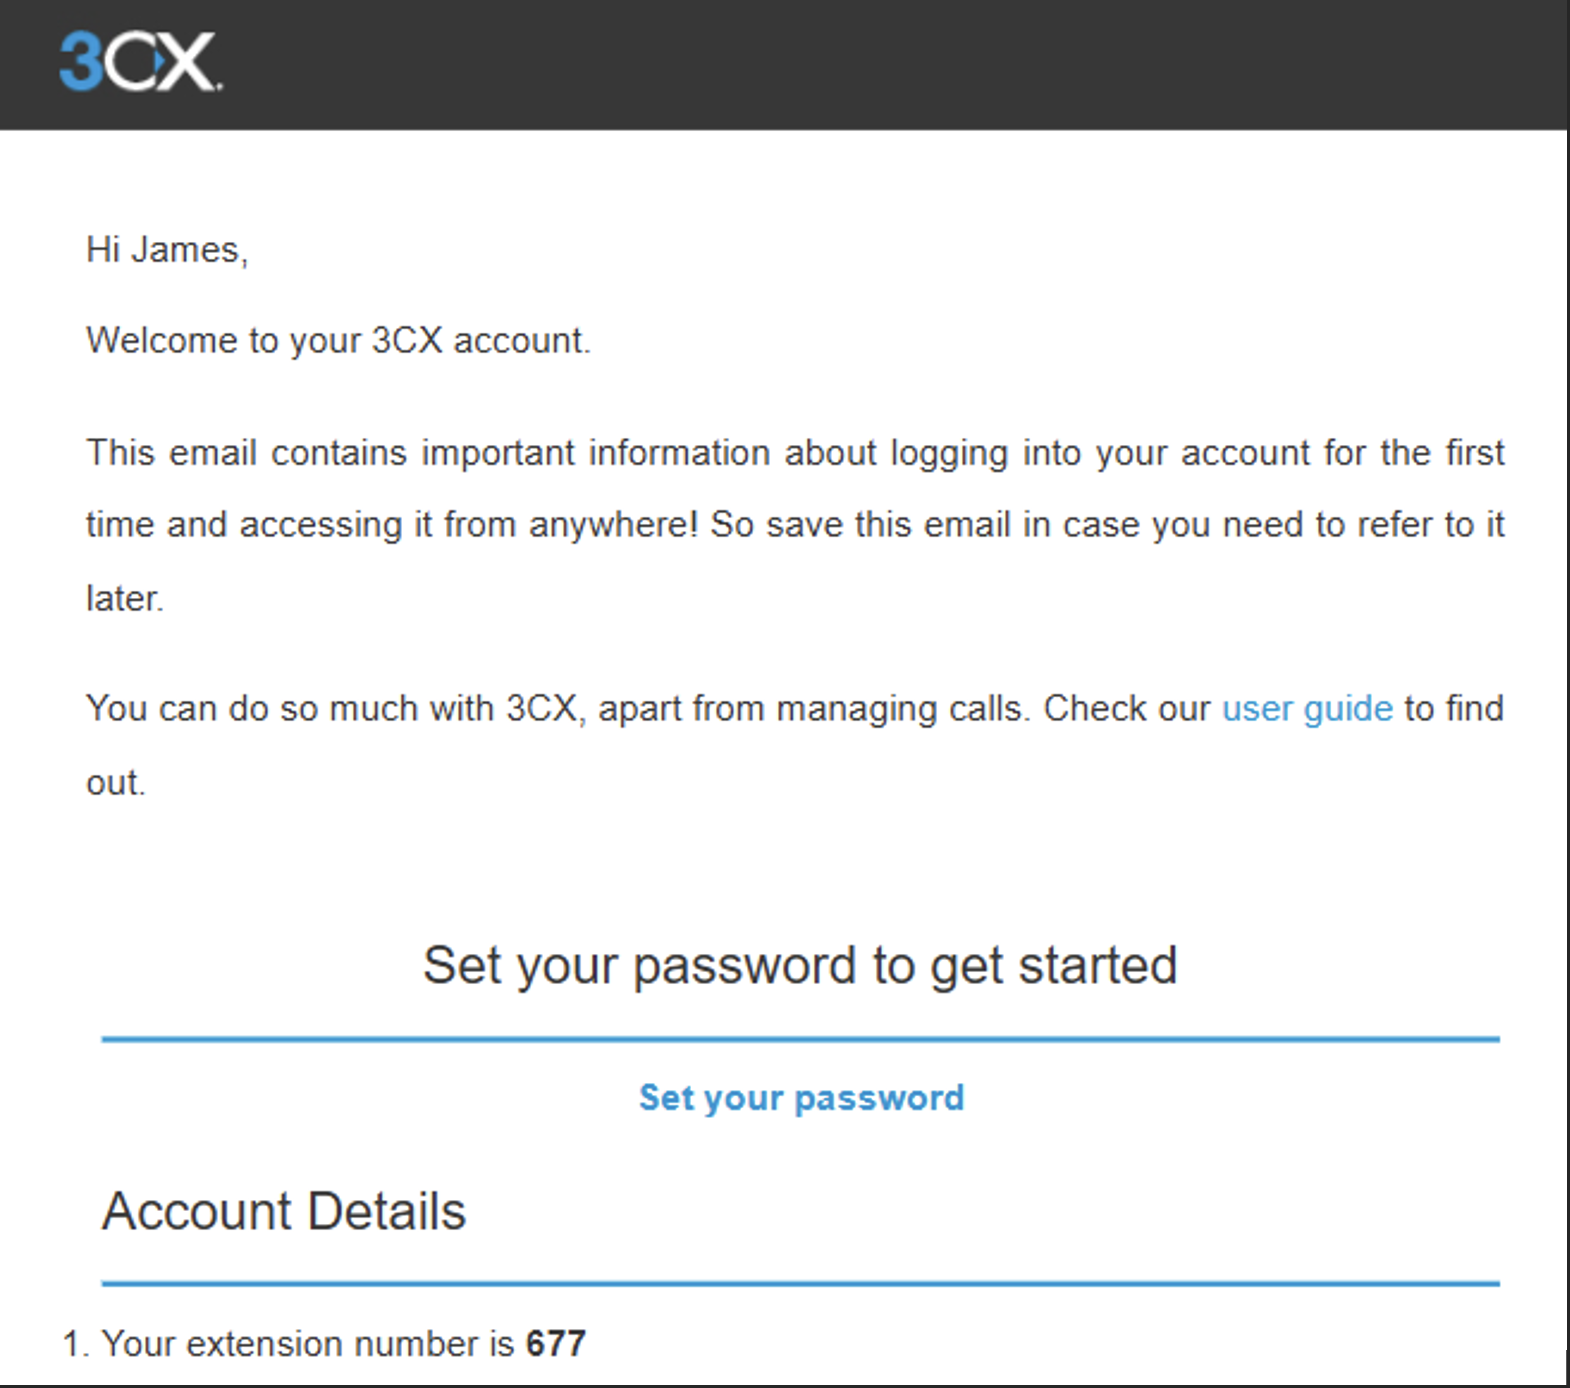
You’ll need to follow the link to ‘set your password’. This will take you to the 3CX web client. Once your password is set you can log in with your new extension number and password.
To change your BLF (Busy Lamp Field) or more widely known as shortcut buttons. You’ll need to access the Settings ➡️ BLF tab in your app or web client. From here you can select an option from the drop-down menu.
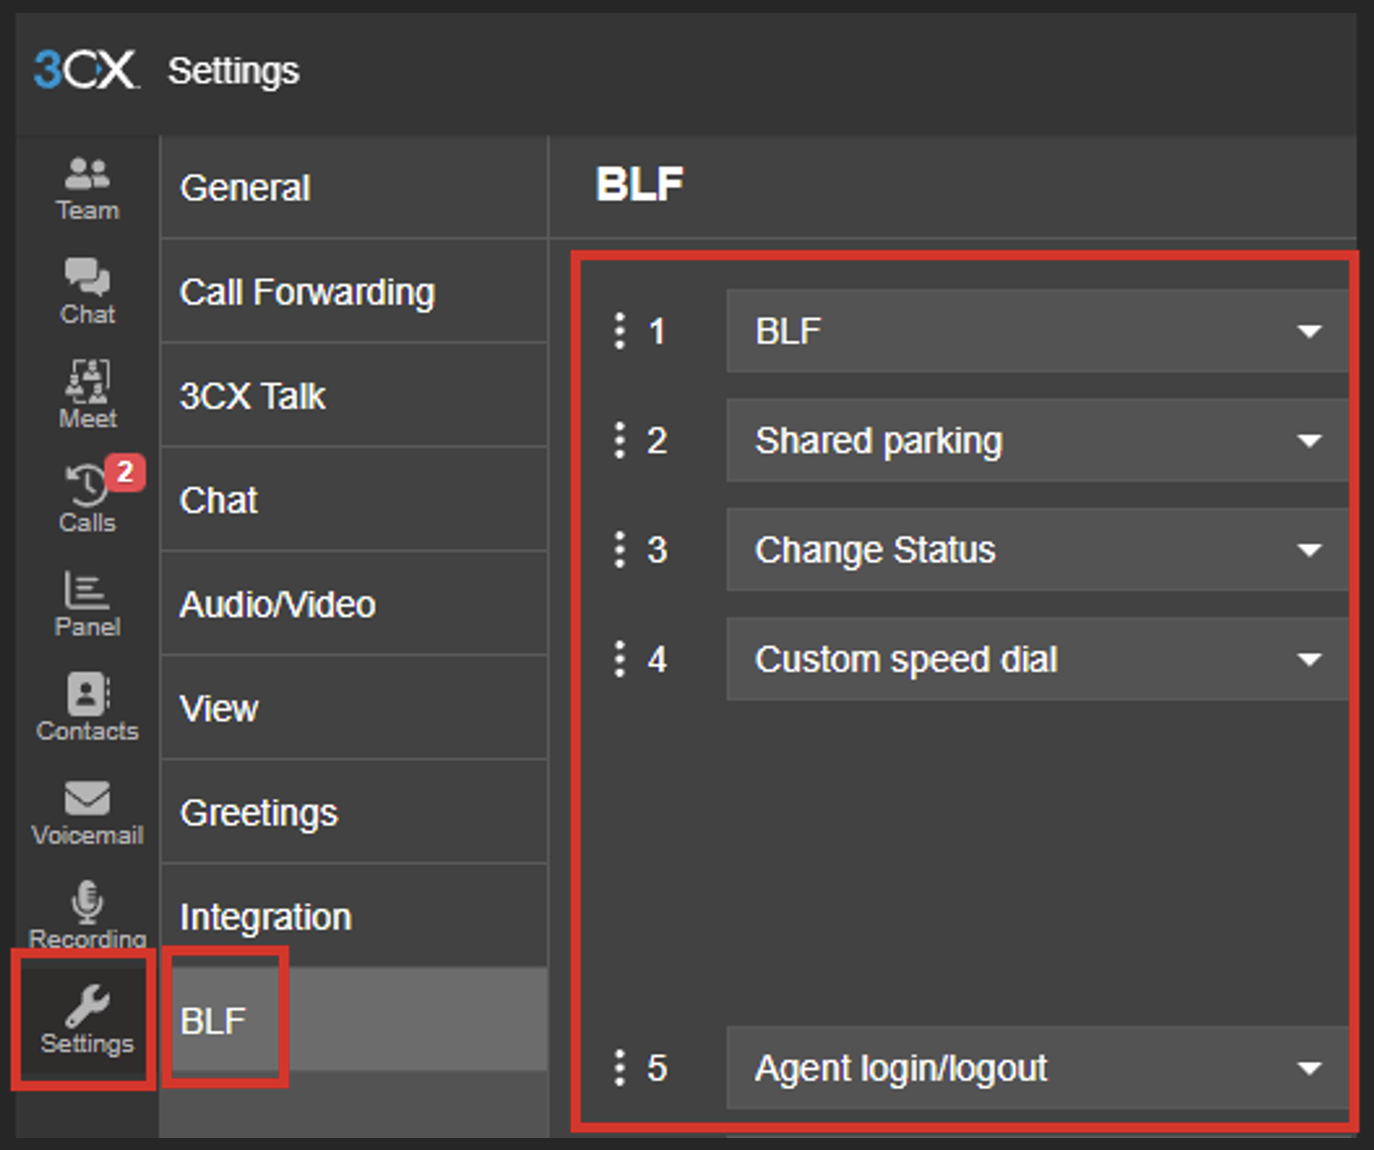
BLF – Shows the status/availability of other internal users on the system and acts a speed dial/transfer button.
Shared parking – A ‘parking bay’ for a call in which a user can press the button and transfer a call to be placed on hold within the system. This can then be picked back up by the user who parked the call or any other user who has the shared parking option.
Change your status – This allows you to quickly change your availability settings on the system. You can choose between Available, Away, Do Not Disturb, Available with Mobile and Out of Office. These settings can also be customised in the ‘Call Forwarding’ tab.
Custom Speed Dial – Allows you to set a customer name and number to speed dial to.
Agent login/logout – Allows a user who belongs to a call Queue to log in or out of that Queue.
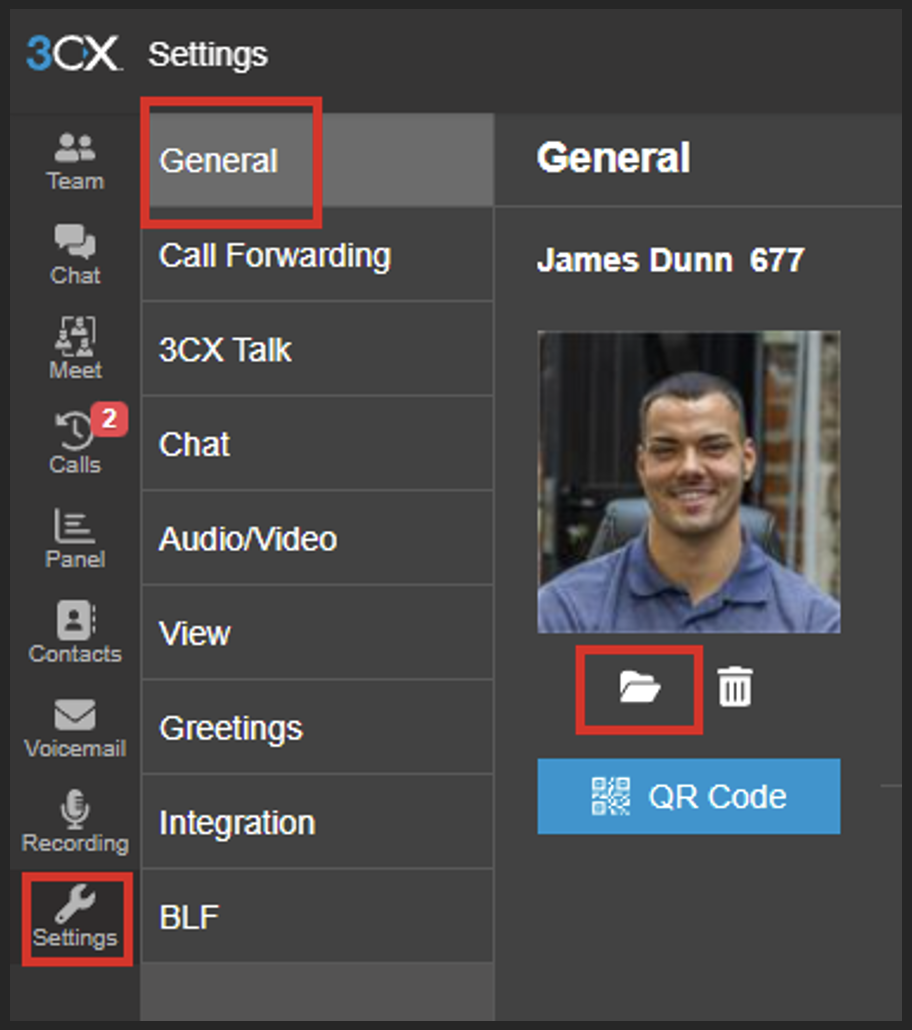
To change your profile picture on 3CX you’ll need to access the Settings ➡ General Tab in your app or web client. You can then select the file icon to upload an image.
To change your status on 3CX you can use multiple options. When on the web client/app, access the menu in the top right by clicking your profile picture/username icon. Here you can select from the availability options and edit them if needed.
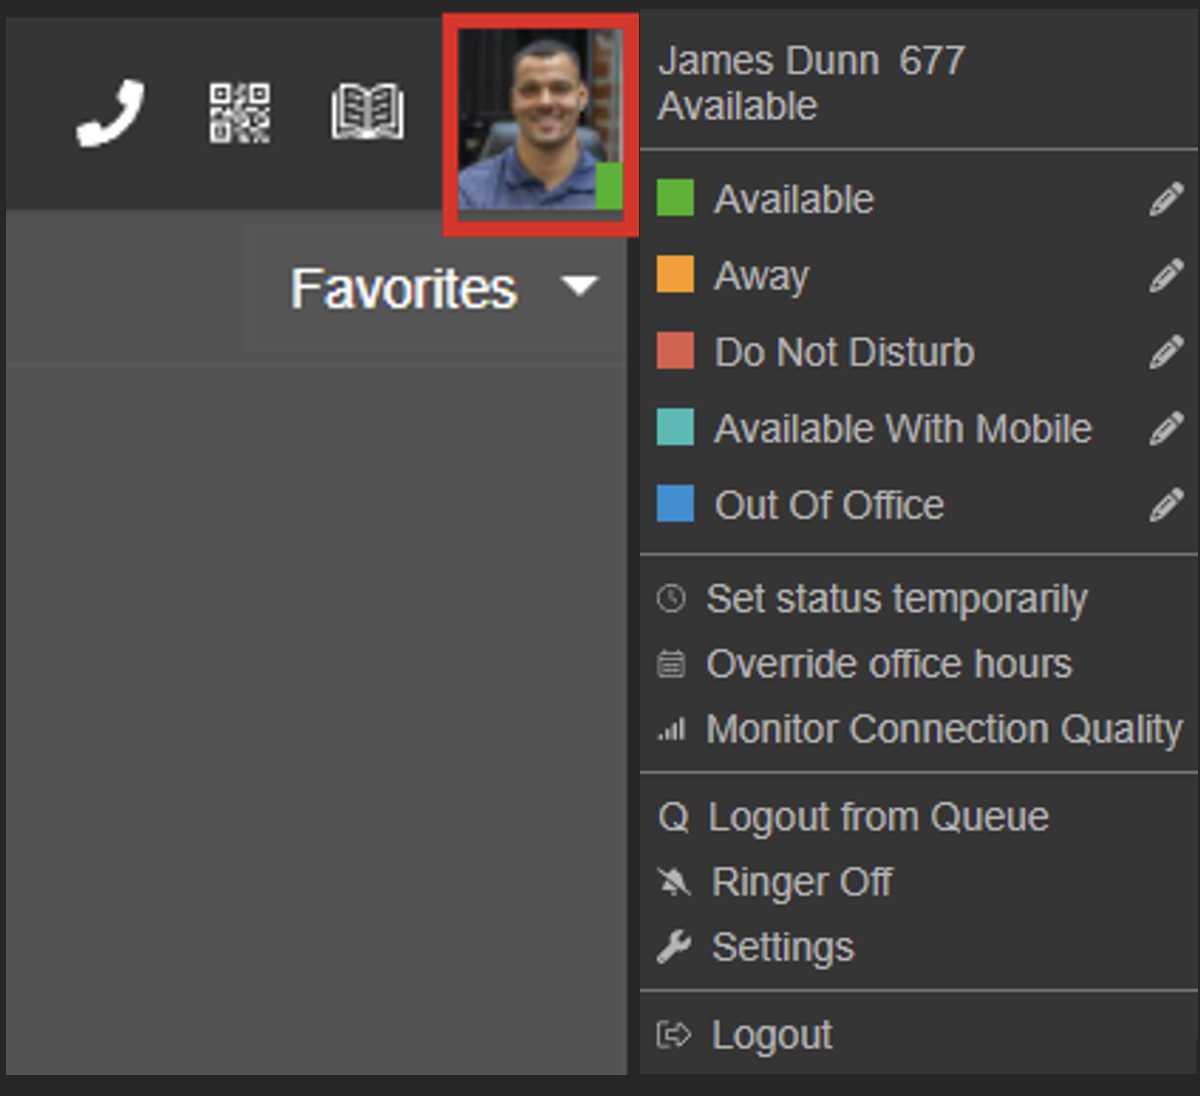
You can also use the ‘status change’ shortcut button on your IP phone if created in BLF.
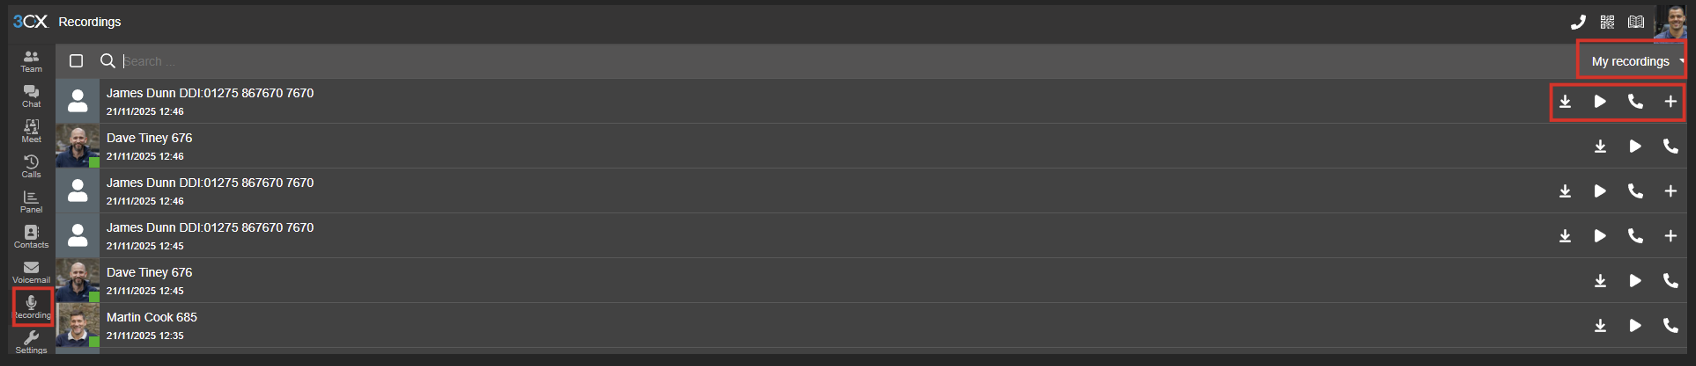
Call recording isn’t always on by default but if your system has it allowed and you have the permissions you will find a Recording tab at the left of the screen on your app or web client. Once here you can select a drop down between ‘All recordings’ and ‘My recordings’. You can download the recordings, playback the recordings, call back the other participant on the recording or add them as a contact.
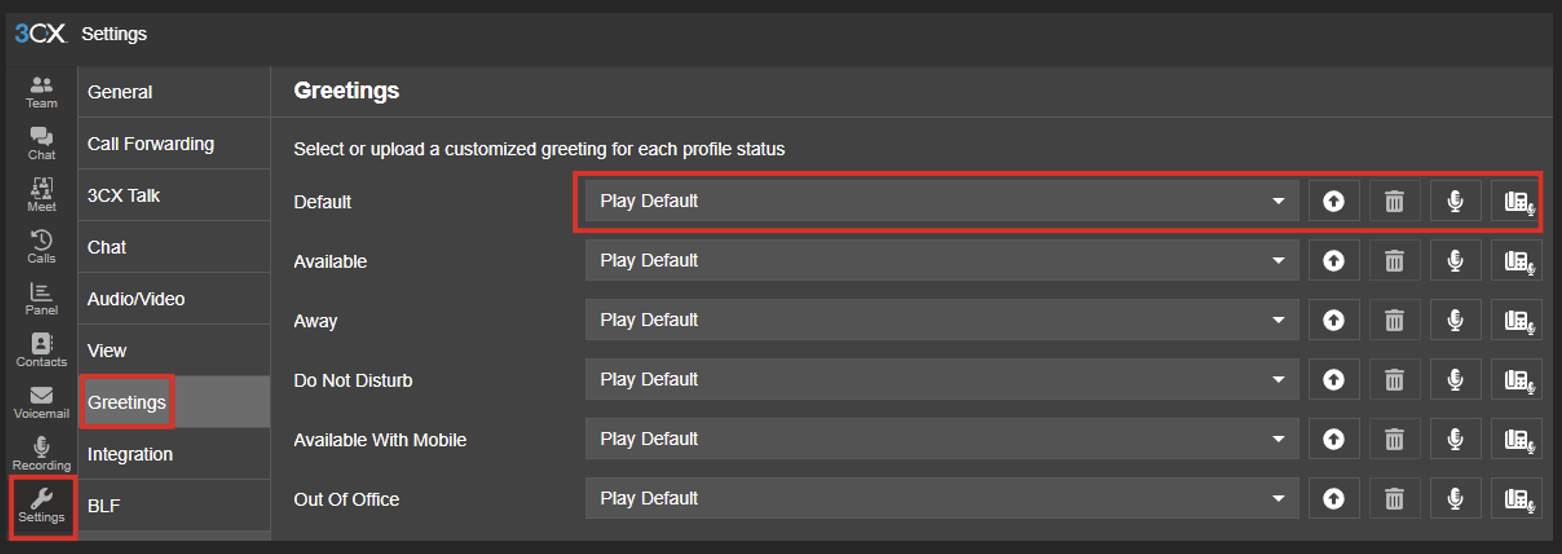
To change your voicemail on 3CX web client or app you need to access the Settings ➡️ Greetings tab. You will then have the option to customise your default greeting or the greeting for different availability settings. Here you can upload audio files, delete greetings, record new messages with a microphone or dial to your IP phone to record the message.
To change your voicemail greeting via your IP phone you will need to press the voicemail button or dial 666 and follow the prompts. Usually, you will have to end to VM PIN followed by #. Then press 9 for options, 8 to change greeting, 0 to record and once you have finished recording you will press # and then 0 to save.
There are two ways to start a conference call: either scheduled or ad-hoc.
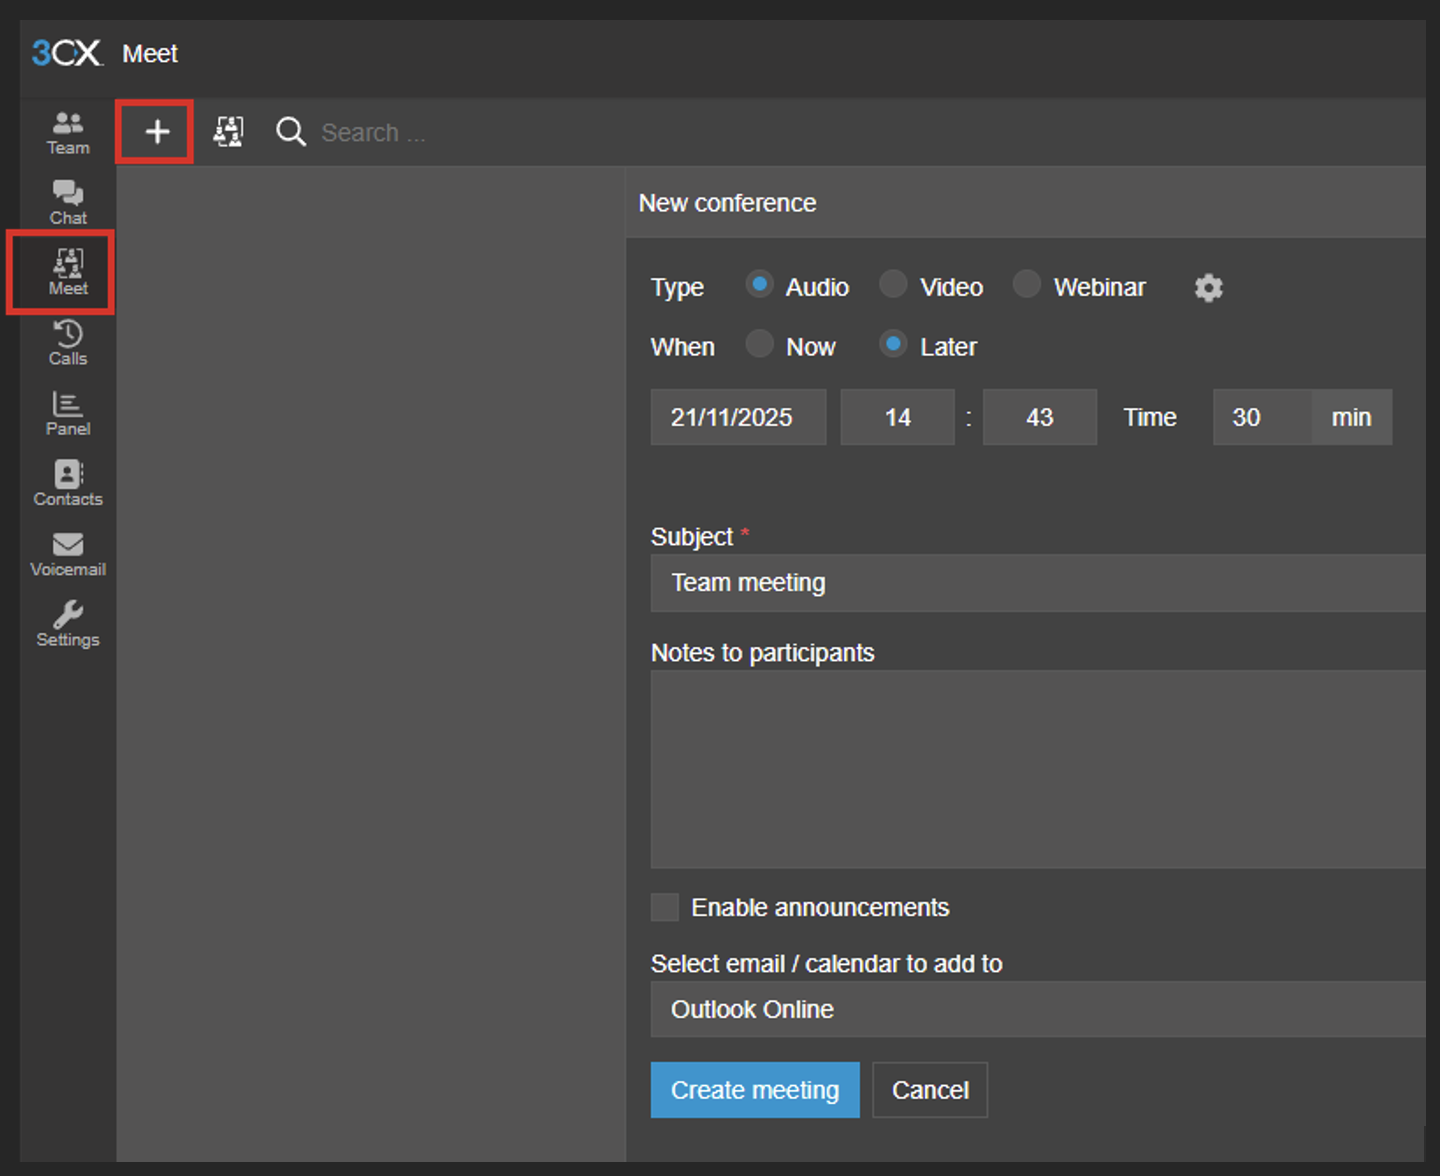
To create a scheduled meeting/conference you need to open your web client/app and go to ‘Meet’ tab. Here you will need to select the conference type (audio/video/webinar), date and time, meeting subject andan email/calendar location.
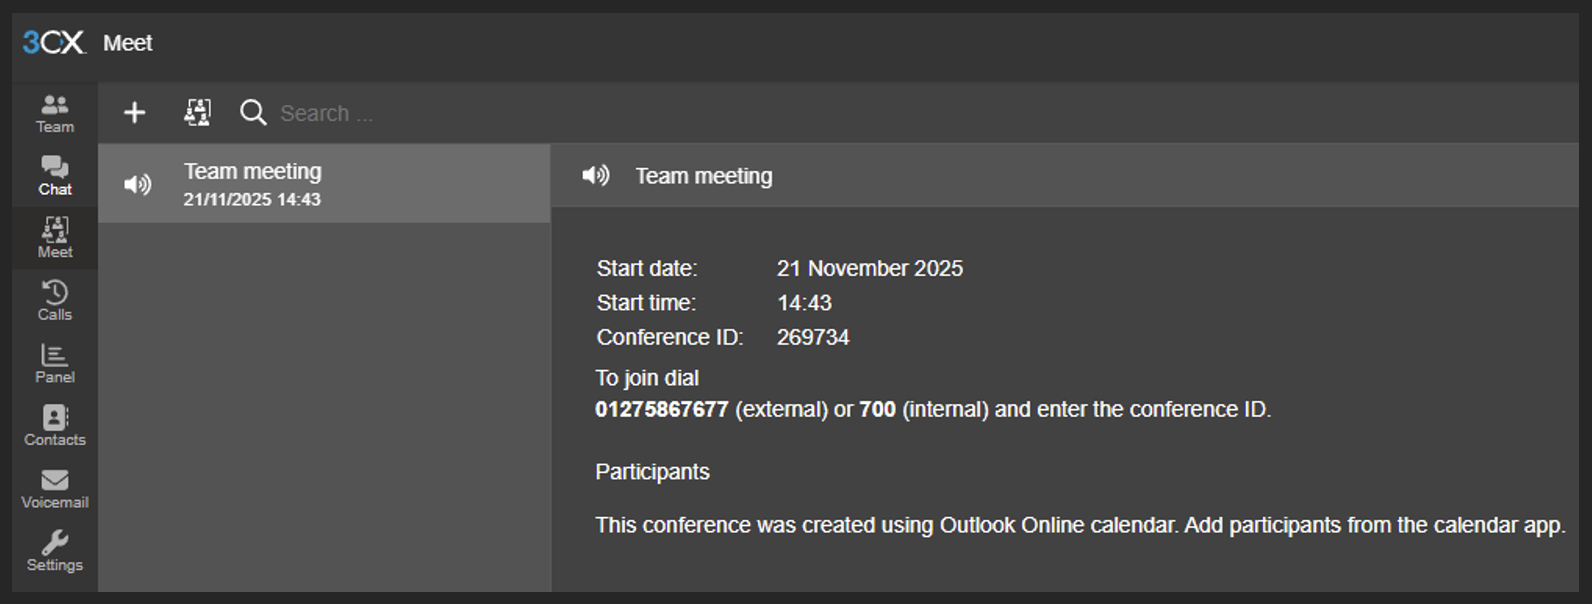
Once the meeting is created. To join, external participants will need to dial the direct dial number of the conference owner or use the link provided in the email/calendar. Internal participants will need to dial700. The participant will be asked to enter the conference ID followed by #.
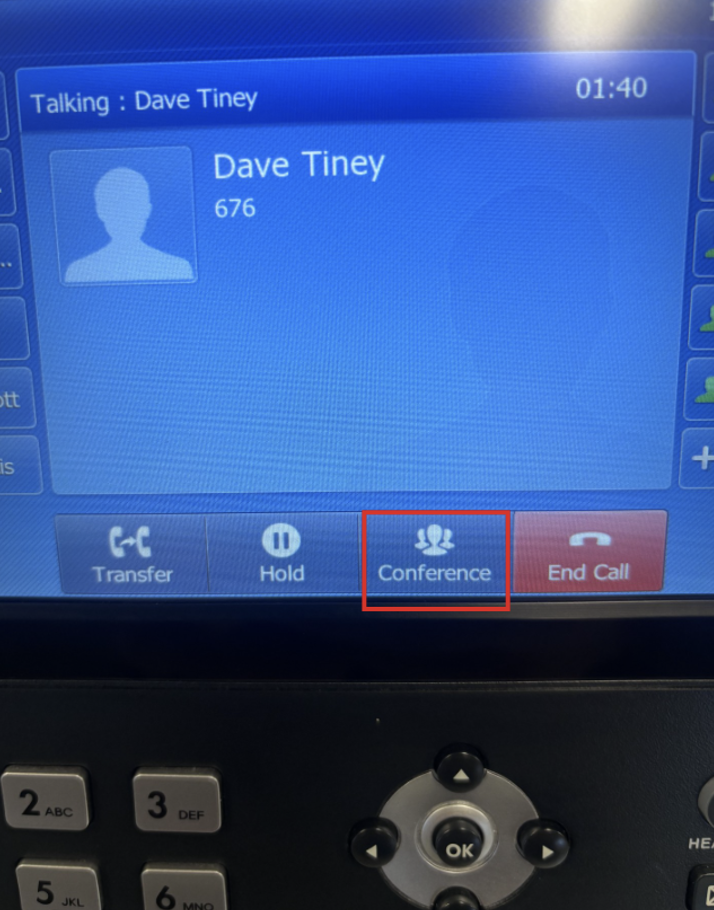
To place an ad-hoc conference call when already on acall simply press the conference button on the screen and then type the contact name/extension/number you would like to conference in.

This is also the same concept whilst on an IP phone.
Please note that this support guide is here to assist users with technical issues. You undertake these steps at your own risk and Bytes Digital Limited is not liable in any way for any malfunctions or other issues caused by users undertaking the steps outlined in this guide. We would encourage customers of Bytes Digital to call us with any support-related enquires.